Did you make any resolutions to de-clutter, redecorate, or just…finally hang some stuff on the walls? I’ve been following along with Apartment Therapy’s annual January Cure, where the team of inspiring interiors experts show you how to finally get your home in shape – just like having a personal trainer for your bod, only they believe that when your home is under control, fresh, clean, and organized, good things happen throughout your life. I totally agree that’s true!
Find Your Inspiration
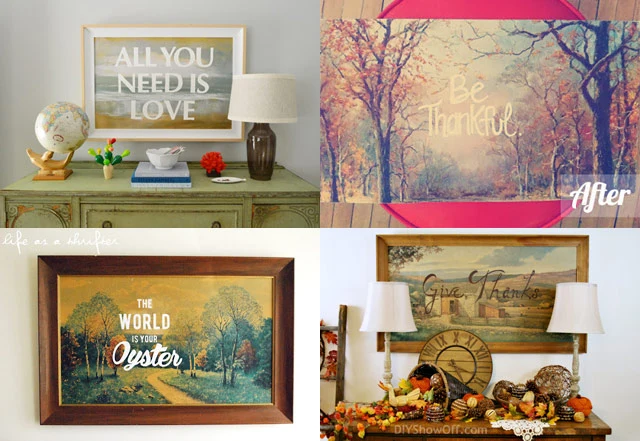
Here were some of my “Pinspirations” for this month’s DIY upcycle project, which I’ve been collecting on our Art of the Thrift board on Pinterest. With the rising popularity of Paint Nite, I see an increasing number of these canvases ending up at Goodwill & they’re just screaming for personalization!
Photos, clockwise from top left: Young House Love, Life As a Thrifter, DIY Show Off, Life As a Thrifter.
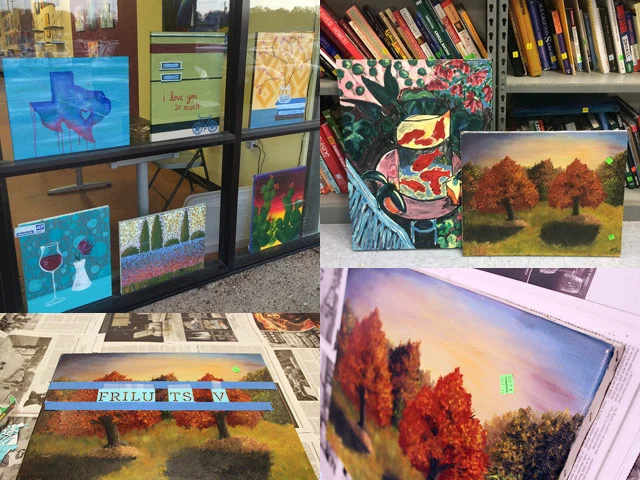
One of the things I cherish most about living in Austin is the ability to enjoy being outdoors all year ‘round, and this recently discovered Norwegian phrase for that happiness we find through nature – Friluftsliv, or “free air life” — was such a great reminder to never take that for granted, as well as a great way for me to celebrate my own Scandinavian heritage.
Customize Your Artwork
Here’s all you need to customize your own thrifted canvas into a one-of-a-kind, personalized piece of artwork for your home:
Canvas painting, in decent condition (no holes or tears)
Acrylic paint (in a coordinating/contrasting color to your painting)
Small, fine-tip paint brushes
Chalk
Letter stencils
Painter’s tape
First, I brushed the canvas clean of any dirt or dust. Then I lined up a piece of painter’s tape about 1/3 of the way down the painting from the top, to use as a guide for my stencils. I spelled out my word in stencils and used some Scotch tape to hold the stencils in place against the painter’s tape, without risking taking off paint from the original painting, and ran a parallel piece of painter’s tape across the bottom of the stencils.
Using my small paintbrush, I carefully painted within each stencil to create the letters – hopefully without any bleeding. Letting them dry for about 20 minutes, I then removed the stencils and the top line of painter’s tape, cleaning up any smudging/bleeding with a fine tip paintbrush.
Below the bottom line of painter’s tape, I hand-drew my word’s definition in chalk outline, then painted directly over it using the fine tip paintbrush. After removing the rest of the painter’s tape and letting the whole thing dry for about an hour, my new customized thrift store artwork was ready to hang on the wall and show off.